
- You have no items in your shopping cart
- Subtotal: ₹0.00
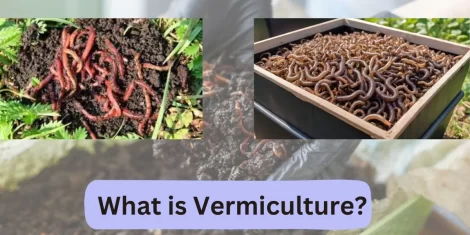
Vermiculture is the technical word for the process of artificially growing worms or cultivating worms in order to convert organic food wastes into a nutrient-rich substance. Earthworms eat farmyard manure, roughages, and farm wastes to produce vermicompost, which is the result of vermiculture. Rich in minerals and other compounds that support plant growth, the vermicompost that is created can provide the essential mineral resources that plants require to grow and thrive.
However, how did the vermiculture method get started? Let us give you a quick overview of vermiculture’s past.
What is the history of vermiculture?
In the 1970s, biology teacher Mary Appelhif was the first person to introduce the vermiculture procedure. She devised the idea to use red wiggler worms (Eisenia fetida) in indoor as well as outdoor systems to turn kitchen waste into worm compost. We got it because her concept worked.
What most people want to know is whether there are different kinds of vermiculture. Indeed, there are! Let’s examine some of the details.
Types of vermiculture
The manual process
Most commercial crop producers don’t work with their hands. On the other hand, this vermiculture method is employed by hobbyists and small-scale worm sellers. Using one’s hands, dig the worms out of the ground and gather them manually.
Since worms cannot withstand direct light, the hand-harvesting technique takes advantage of this particular trait. The organic material that contains the worms must be kept on a level surface that is exposed to light during this process. When the above process is finished, the worms will start to descend beneath the surface.
People will now go on and remove the layer of organic compost above it, stopping until they are once again able to see the worms. A small quantity of compost remains on the worms’ bodies, but otherwise, they continue the process until no compost is left. They quickly gather stuff in a container, determine its weight, and then deliver it.
There will be significant improvements and changes made to this vermiculture method as well. For instance, individuals can put the organic material and worms in a container rather than a flat surface. This harvesting approach is effective in limited areas with large worm populations.
Migration technique
The foundation of this vermiculture method is the worms’ inclination to move in search of food or due to environmental factors like light or dryness, which are detrimental to them. As a result, individuals favor using screens and onion bags for harvesting migration activities.
There are two methods to use screens. The first is the most often used and easiest. During the vermiculture process, a box is constructed using the screen’s bottom surface. A mesh with a size of between 1/5 and 1/9 is needed. As a result, this vermiculture procedure has two options to choose from.
Downward migration method –
The hand-harvesting method and the downward-migration method are quite similar. The purpose of the light in this vermiculture method is to encourage the worms to move. The worms will migrate past the screen and into a damp peat moss-filled container that has been previously weighed. This is how the screening method differs from the manual technique.
Once every worm has been pushed through the screen into the container, the organic compost produced in the box will be taken out. The fresh, worm-infested compost is then typically added to the box.
The vermiculture procedure will carry on until the damp peat moss box is full and the target weight is achieved. In addition to being able to gather worms in multiple areas at once, this strategy also saves time by having the harvester move from one container to the next while the worms are migrating.
Upward-migration method–
Worms can migrate upward by an upward-migration vermiculture process that is identical to the downward-migration approach. But in this instance, the mesh-bottomed box will be positioned directly within the worm bed. Prior to spreading the worm-attracting food on top, folks first fill the container with peat moss. This diet includes things like fresh animal dung and coffee grounds. The box will then be taken out and the weight will be determined. Once it is visually confirmed that the majority of the worms have moved inside the organic material, it is finished.
Mechanical Method
Worms are gathered using a mechanical harvester in this manner. It’s a rotating screen, sometimes known as a trammel screen, and it’s used for the separation of materials. It is cylindrical in design and measures around 11 feet long by 4 feet wide. A variety of screening materials with varying mesh sizes make up the cylinder’s walls. An electric motor powers the cylinder. The apparatus would be positioned at an angle on the trammel’s upper side. After that, the castings are prepared and the worm beds are applied. Worm castings fall through the screen as soon as the rotation begins, go across the trammel apparatus, and then enter the wheelbarrow.
Vermiculture Process
Farmers combine large quantities of organic wastes, such as plant materials and animal manure, in a 1:1 ratio to multiply earthworms. After the substrate medium is created, 40–50 different species of earthworms are introduced into it, where they are protected from the elements.
Earthworm growth depends on routine upkeep. The ideal temperature and moisture content are 15 to 25 degrees Celsius and 80 to 90 percent, respectively. The earthworms can be gathered when they have multiplied up to 300 times in one to two months, depending on the procedure and other conditions.
Materials Needed for the Vermicompost Process:
- Crop residues
- Vegetable waste
- Shed
- Pits
- Water supply
- Cattle manure
- Dried leaves
- Waste from agro-industries
- An apt container
- Earthworms
Which kinds of earthworms are used in vermiculture?
Earthworms are essential to the breakdown of organic waste in the soil, which produces rich soil suitable for farming. Put another way, earthworms improve the quality of soil needed for cultivation by recycling organic waste produced by many life forms to build humus. Earthworms are classified into four groups, or ecotypes, based on how they burrow and feed during the vermiculture process.
Epigeic earthworms
The top soil layer is home to these types of earthworms. These are not earthworms that dig; rather, they survive by feeding on soil litter. These are not little earthworms. They are not peeled and are crimson to red-brown in color.
Endogeic earthworms
These ones are digging. Below the soil’s surface, these worms consume organic matter while excavating horizontal burrows. Small and feeding on rich soil are endogeic. It appears that these earthworms are pale and lack color.
Anecic
These earthworms dig permanent, vertical, deep tunnels in the soil, where they feed on soil litter. These earthworms can therefore be found in both deep and shallow soil burrows. Castings from worms are often found in meadows. The bodies of these massive earthworms are colored dorsally. The tail is lighter than the headpiece, and the head portion is either red or brown.
Compost
They’re typically discovered in compost pits. These earthworms thrive in environments that are moist, warm, and have easy access to compost. When earthworms eat compost, vermicompost is produced. The earthworms are red and striped.
The Importance of Vermiculture
Earthworm culture is known as vermiculture. It is a useful method for raising the soil and plant fertility. The primary goal of worm reproduction in vermiculture is to expand the population of worms. Next, vermicompost is made to help in the development and growth of crops. Along with enhancing soil porosity and water retention, it also promotes disease in plants. This promotes organic matter and significantly lowers the requirement for chemical fertilizers.
How Vermicompost Is Prepared
Select a container with the right measurements and construct a worm bed in the container’s hole. Paddy husk, coir waste, sugar cane rubbish, and old papers make up this worm bed. Over this mixture, a thin layer of soil is applied, and the humidity is kept between 40 and 45 percent.
Over the course of two weeks, a mixture of cattle dung, biogas plant slurry, and organic waste is poured over the bed and left to partially degrade. The bedding will warm to between 50 and 55 degrees Celsius during this period. To get rid of dangerous germs, add 5–10% neem cake.
The earthworms are added once the temperature has dropped to thirty degrees. For every 100 kg of organic material, about 500 earthworms are added.
Straw and jute clothing cover the bed to keep the worm safe. The moisture content is controlled between 45 and 50 percent, and the temperature is kept between 20 and 30 degrees Celsius.
The worms are separated from the compost by putting the vermicompost in a heap under sunlight on a plastic sheet after the compost is finished, which should take about sixty days. Since earthworms are photosensitive, the top layer of compost can be removed after they settle to the bottom of the compost heap.
Facts about vermiculture
- Vermicompost is a sustainable material that can aid in lowering landfill waste.
- Plant growth benefits greatly from the worm liquid found at the bottom of the worm bin. Another name for it is worm tea.
- Worms have five hearts and no eyes or ears.
- Their skin serves as their breathing membrane.
Benefits of Vermiculture
- It is thought to be a cost-effective technique.
- Vermiculture has several advantages, including helping with soil fertilization, plowing, and giving plants the nutrients they need.
- The earthworms will help to promote soil aggregation, increase soil fertility, and improve soil structure.
- It promotes plant growth, which raises the production and quality of agriculture.
- Furthermore, earthworms can speed up the entry of water.
- The tunnels made by earthworms will help the soil absorb water.
- The earthworms will add more minerals to the soil, which will enhance the amount of nutrients that the plant can access.
- You may feed fish and pets with these earthworms as well.
- One benefit of vermiculture is that it can help keep the pH of the soil balanced. By examining the castings that the earthworms release, the farmer can determine whether the pH level of the soil is neutral.
- The plant wastes will be cleaned and composted by the earthworms.
- Earthworms encourage the population of microorganisms to expand. There are lots of these bacteria around earthworm burrows that help fix nitrogen.
- It reduces the quantity of energy and water that waste management systems use.
- It needs less space, less effort, and less maintenance.
Negative aspects of vermiculture
- It is a laborious procedure that takes around half a year.
- There can be a faint odor while it’s happening.
- Since it needs to be kept in optimal operating condition for a long time, maintenance is important.
- If you’re not paying enough attention, you run the risk of being sick and having pest problems.
Summary
One excellent way to improve soil and plant fertility is through vermiculture. Its main goal is to reproduce worms in order to grow in population. After that, it is ready to promote the development and growth of crops. In addition to converting waste into useful manure, earthworms support the health of the ecosystem. The applications and advantages of vermiculture are numerous.